I wanted to share my discoveries with you about how I started my beginner’s garden so you can start one too! I will talk about everything from getting your raised garden built to what to put in your garden.
Before we get started…lets talk about the amazing benefits you get from growing your own garden.
- Loaded with Nutrients – We all know that veggies and fruits are loaded with nutrients. But these super foods are going to be right out your door and a little more convenient to introduce to your diet.
- Prepare Well Balanced Meals – Thanks to having these super foods readily available, you can use them to prepare healthier, more balanced meals. We can’t let all this goodness go to waste!
- Gets you Moving – Growing produce yourself gets you outside and moving. It also lends a hand to getting more vitamin D from the sunlight!
- No Bad Chemicals – The best benefit to growing your own produce is the fact you have 100% control of what is added to your produce. You are getting organic fruits and vegetables but without the added price you often pay in the store.
It’s time to garden!!!
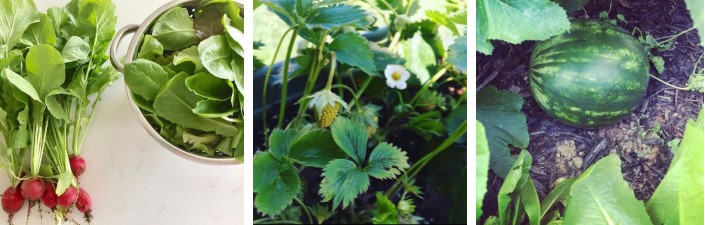
Fresh Produce / Photo Credit: Stephanie Handley
There are three different garden types to choose between. The container garden is a good way to start and works well if you have limited space. An in-ground garden bed is great if you have good soil and is the most economical way to go. Last is a raised garden bed which is what I decided to do and I will walk you through my process of creating it. This type of bed is easier to maintain, its elevated which allows for better drainage, and easier to use high quality soil.
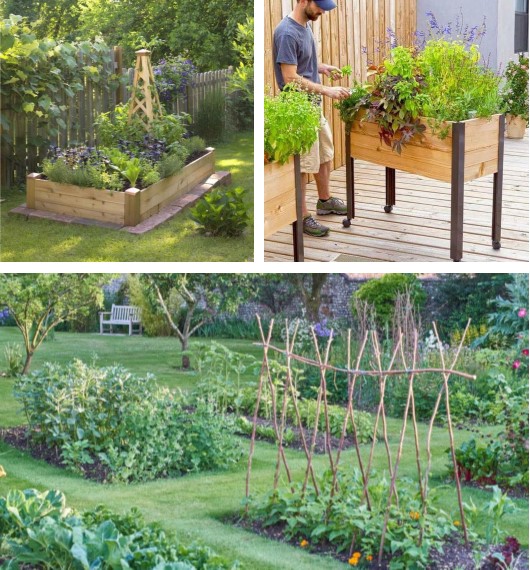
Garden Bed Types / Photo Credit: Pinterest
Location is key and an important step to promote a good growing garden. Picking the correct location will ensure your garden has adequate plant exposure to sunlight and a source of water. Below are a few tips.
- Lots of sun. 6+ hours daily.
- Level ground.
- Some sort of windbreak.
- Good water drainage.
- Easy access to water for irrigation.
- As close to your home as possible.
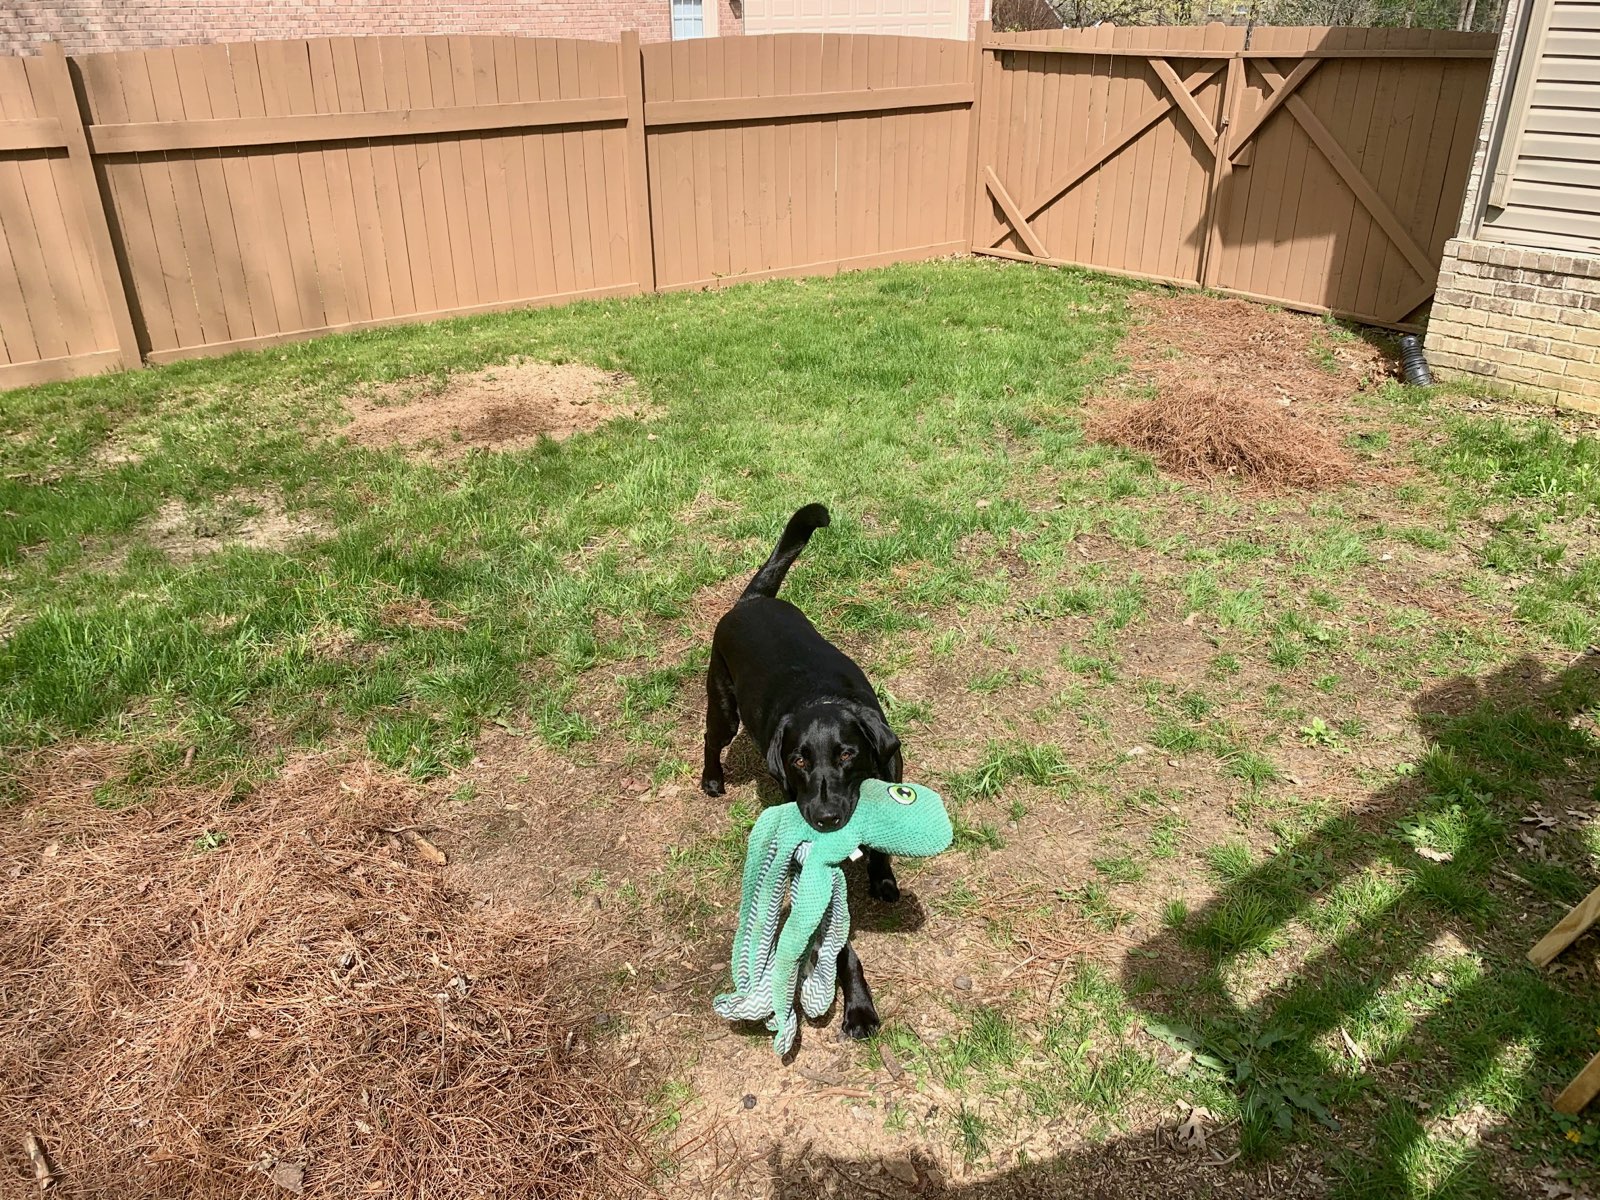
Perfect Location and Perfect Pup / Photo Credit: Amber Grabowski
The wonderful thing about building your own garden is that you can control the size to fit your space or your need and there are many different ways to build it. For my bed I decided on a very common size that is 4’ wide by 8’ long by 12” deep. Eventually I would like to go bigger and even add some tiers (mostly because I think that will be pretty…but let’s be honest, that’s the designer coming out of me). Below I have listed the supplies I used with step-by-step instructions. Note that I was able to do this by myself with a little help cutting the lumber from Home Depot. I am super proud!
Supplies
- (1) 4”x4”x8’ Yellow Pine post – Cut into four 10” pieces ** NOTE: I had extra wood since I used an 8’ long post.
- (1) 2”x12”x16’ Yellow Pine board – Cut into two 8’ pieces
- (1) 2”x12”x8’ Yellow Pine board – Cut into two 4’ pieces
- 2-1/2” Galvanized Exterior Screws
- Cardboard
- Drill
Supplies needed later…
- Measuring tape
- Pencil
- Twine
- 1 ½” Nails
- Utility gloves
- Garden Plant Labels
Ok! Now to start building!
- Cut wood to appropriate size. Like I said earlier I had Home Depot cut mine.
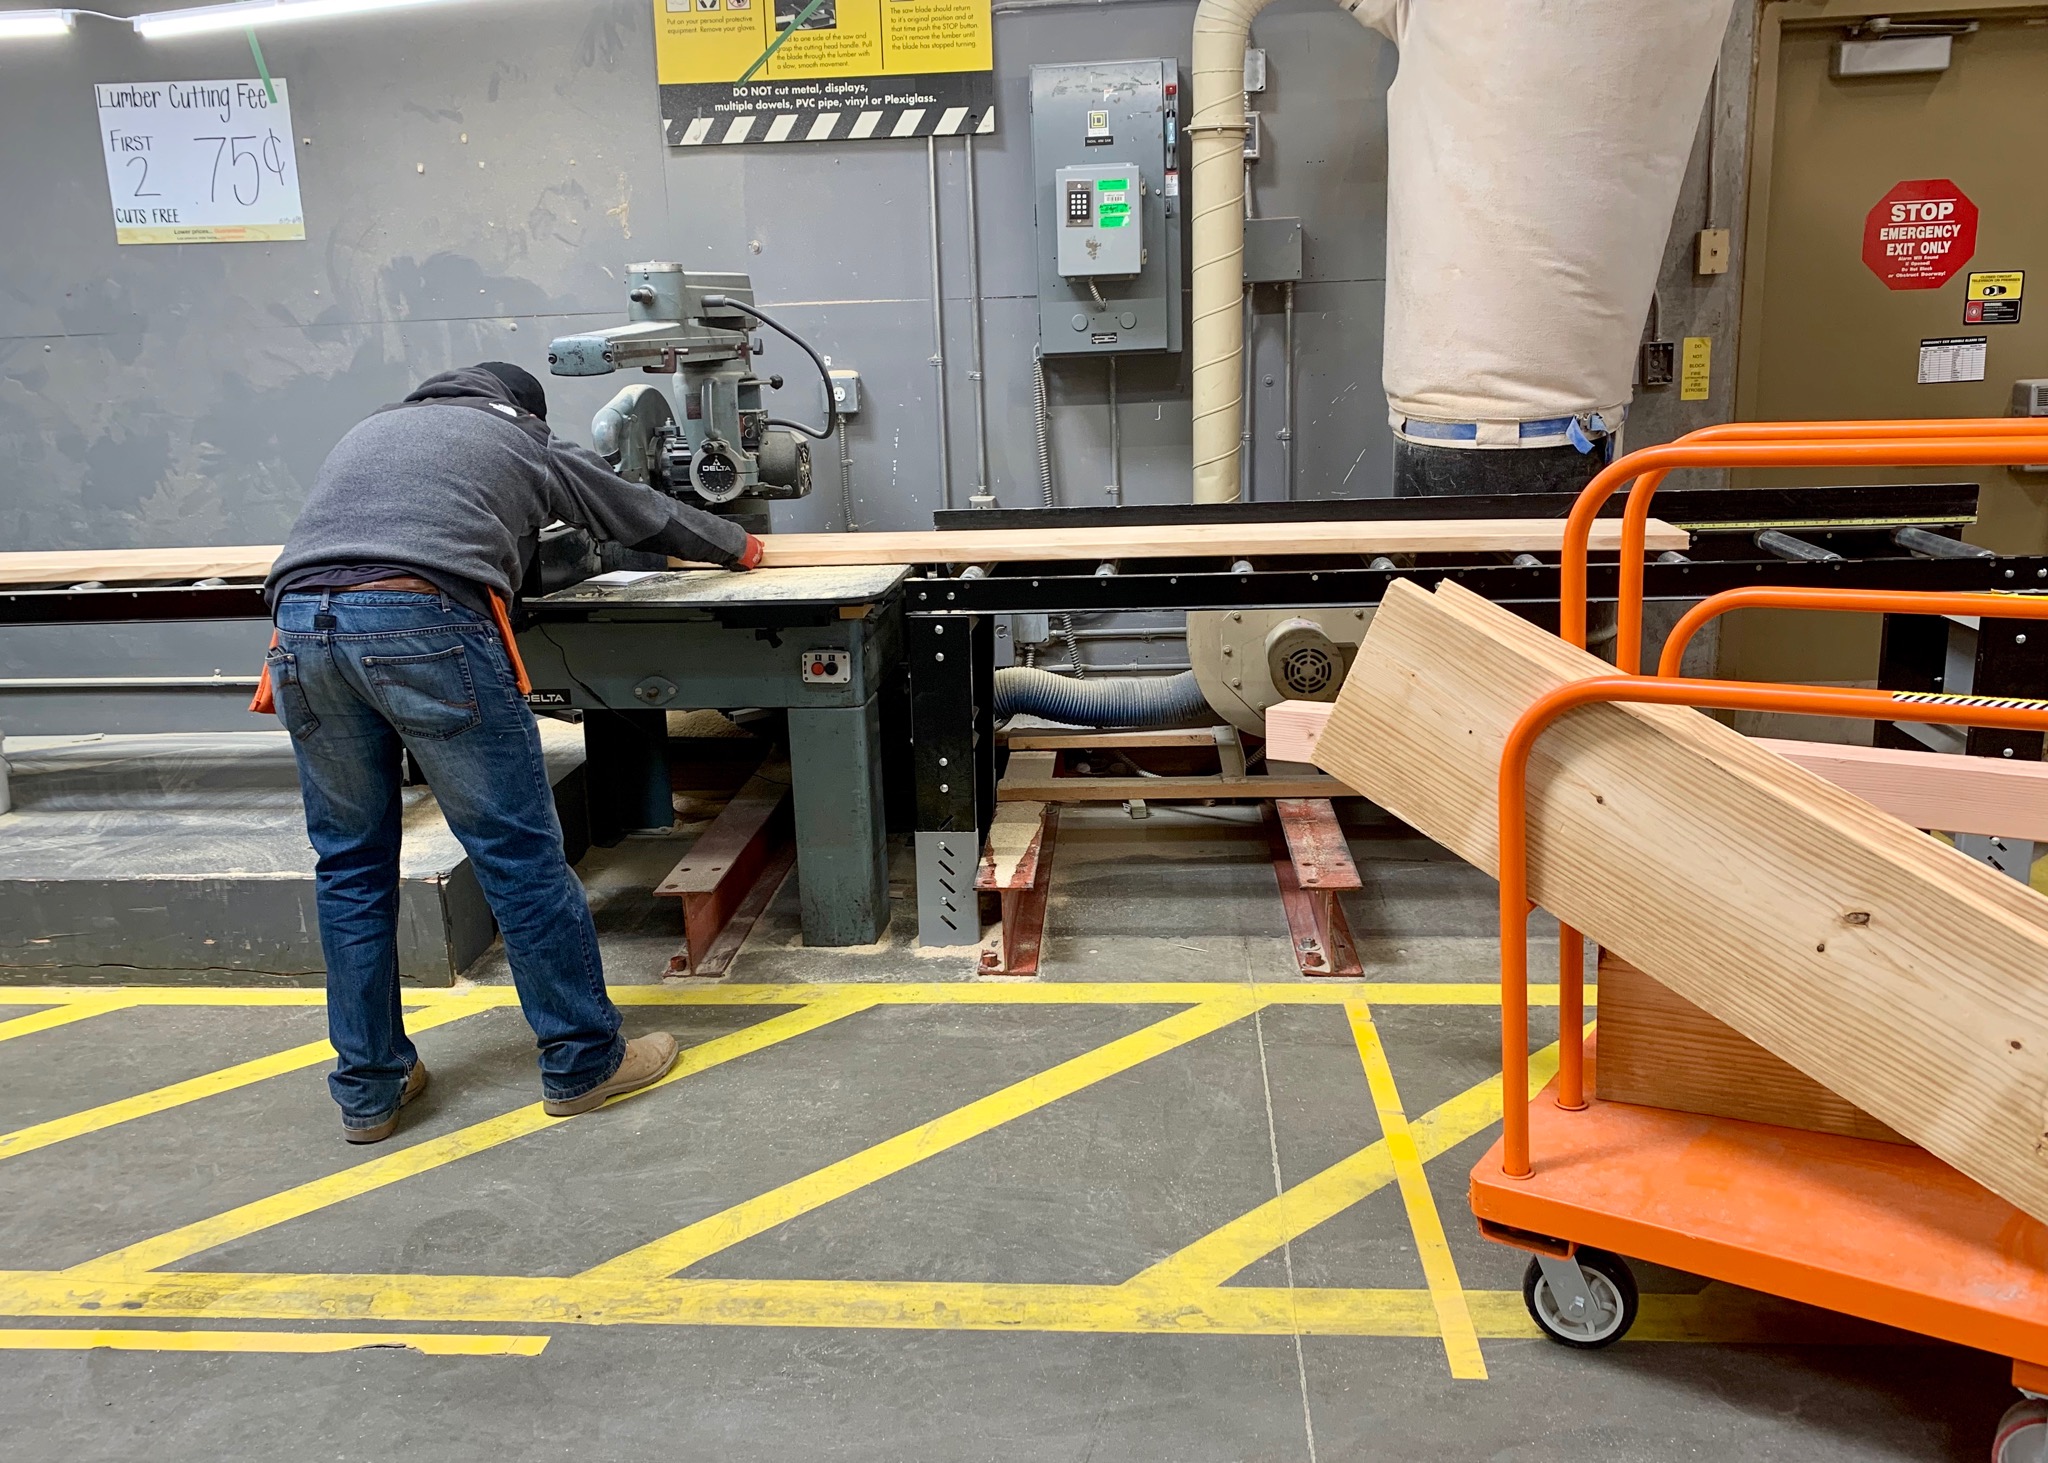
Home Depot Cutting Services / Photo Credit: Amber Grabowski
- Layout the wood in the location you have designated for the raised bed.
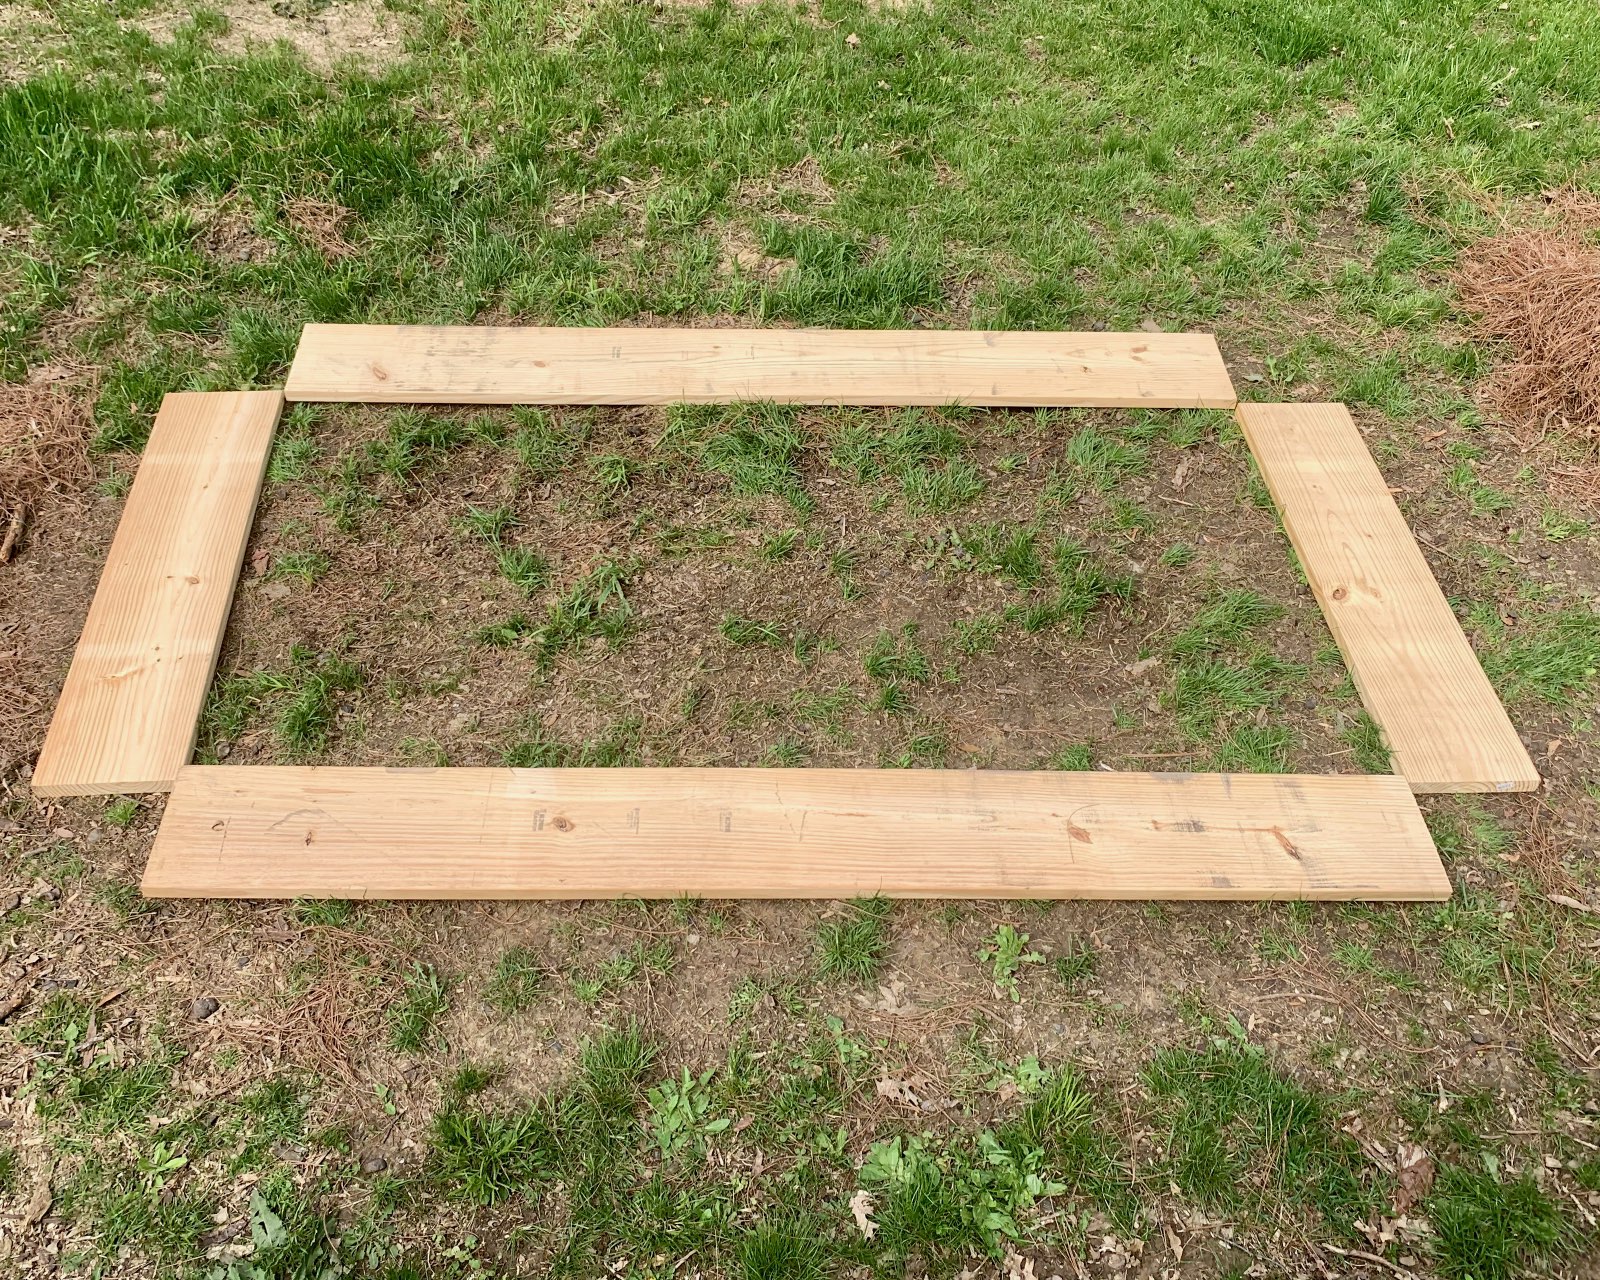
Raised Bed Layout / Photo Credit: Amber Grabowski
- Start with one 4’ side and one 10” 4×4. While standing both pieces up, line the edges up so they are flush on the bottom and the outer edge. Drill three galvanized screws into the two pieces. You will do the same for the other end of the 4’ side you are starting with.
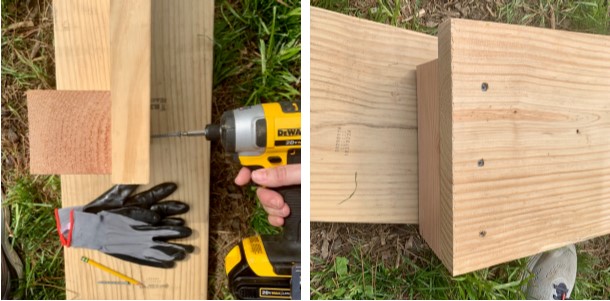
Assembling / Photo Credit: Amber Grabowski
- Continue this for the other 4’ side.
Assembling / Photo Credit: Amber Grabowski
- Now starting with one corner and following with the other three, line up the long 8’ board with the sides and the bottom of the 4×4 post and screw another three galvanized screws into the side and corner post. **NOTE: I used my feet and legs to help hold the short side with the post level with the long side while I screwed them together.
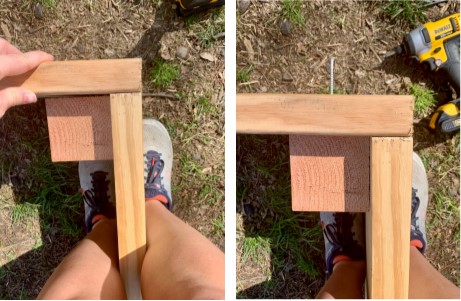
Assembling / Photo Credit: Amber Grabowski
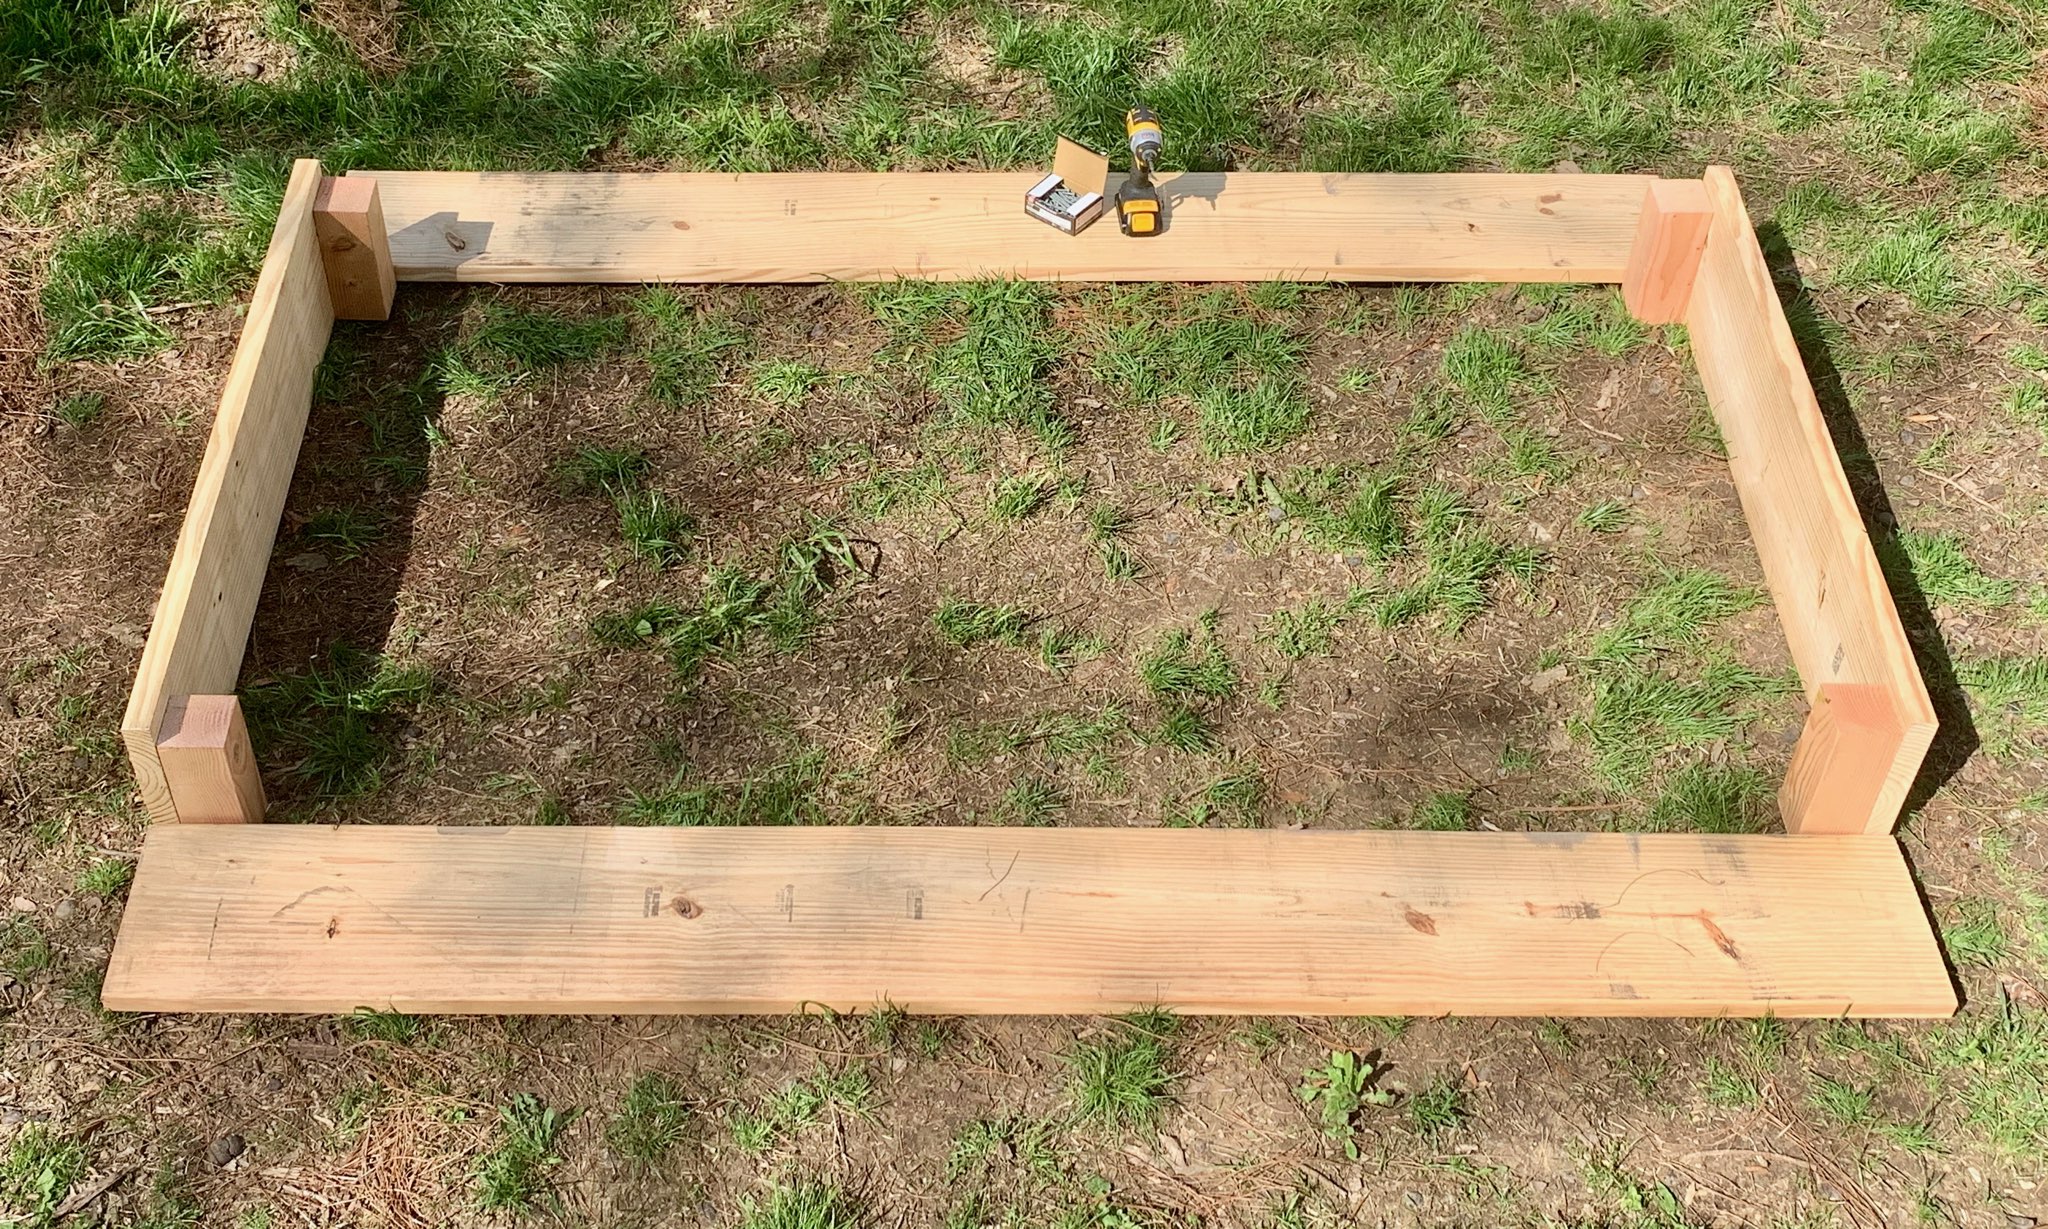
- Wahoo!! Now we are ready for the next step!!
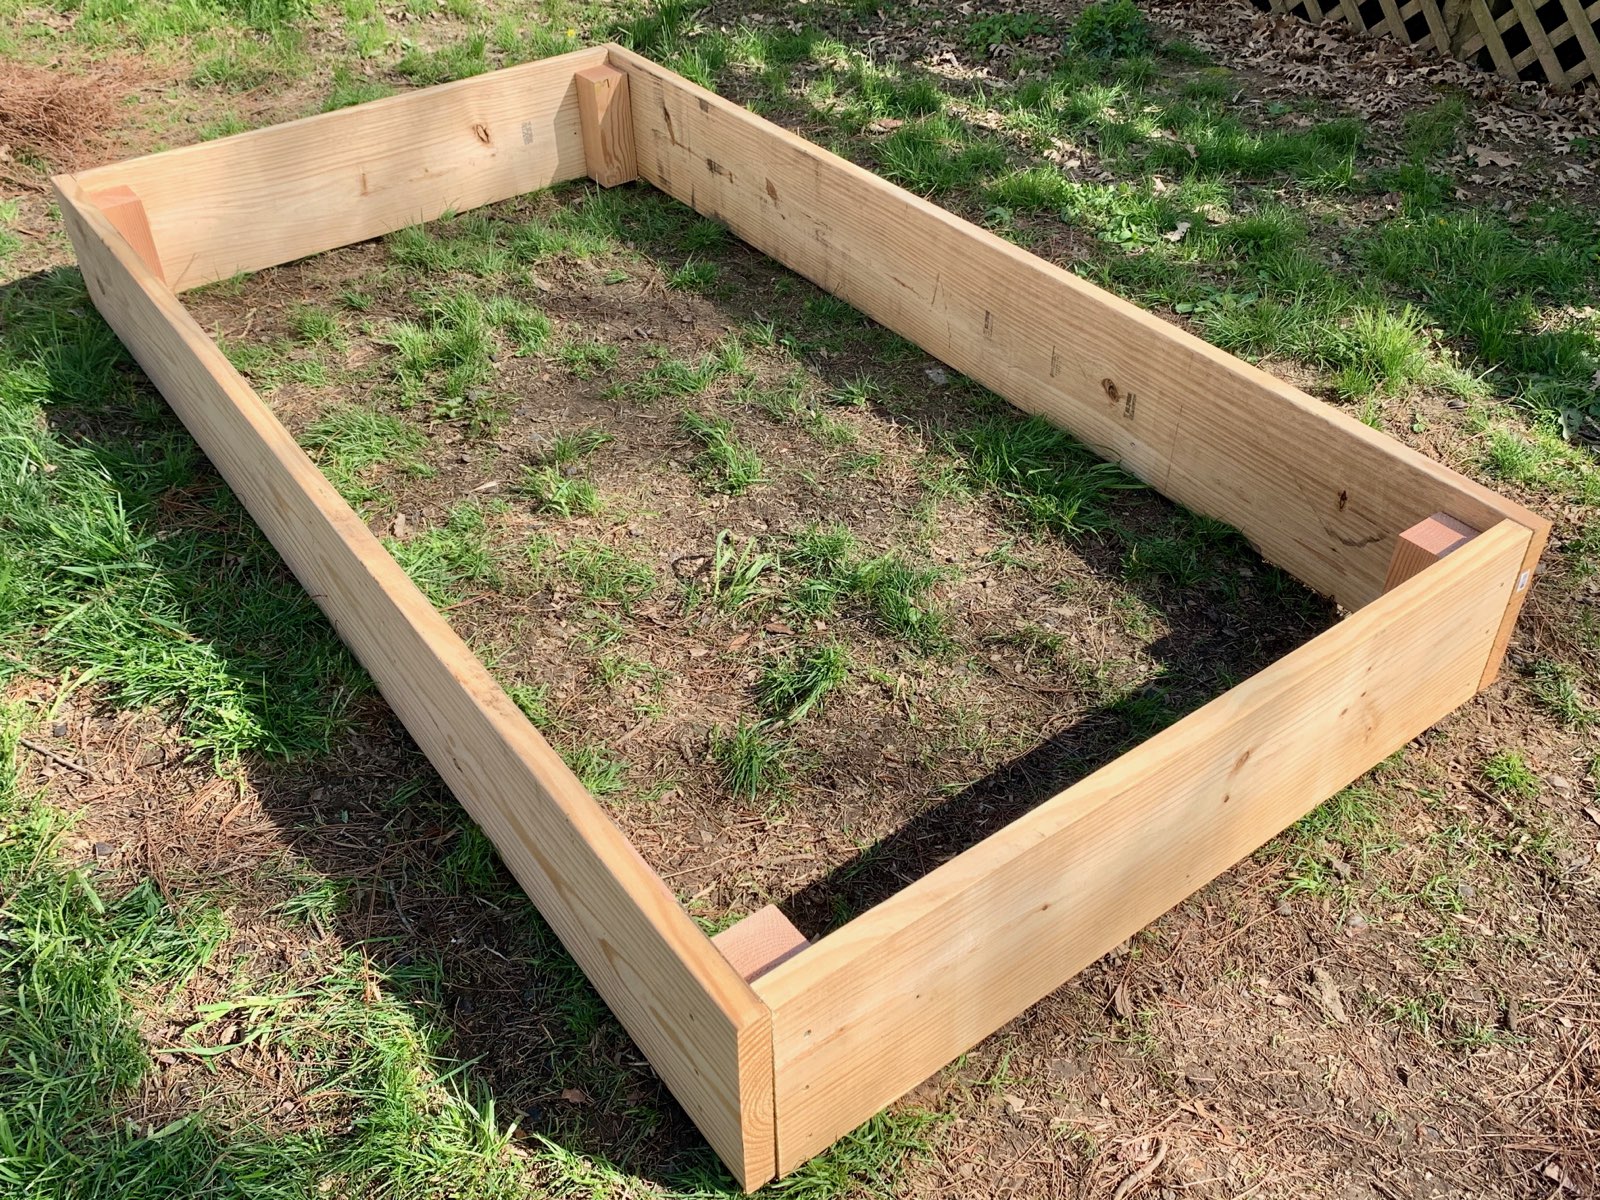
Raised Garden Bed / Photo Credit: Amber Grabowski
Before dirt goes into the newly built garden bed some type of barrier between the grass and your soil needs to be put down. This helps with weeds. You can choose from landscaping cloth, newspaper and cardboard. I chose to do cardboard since I had some on hand.
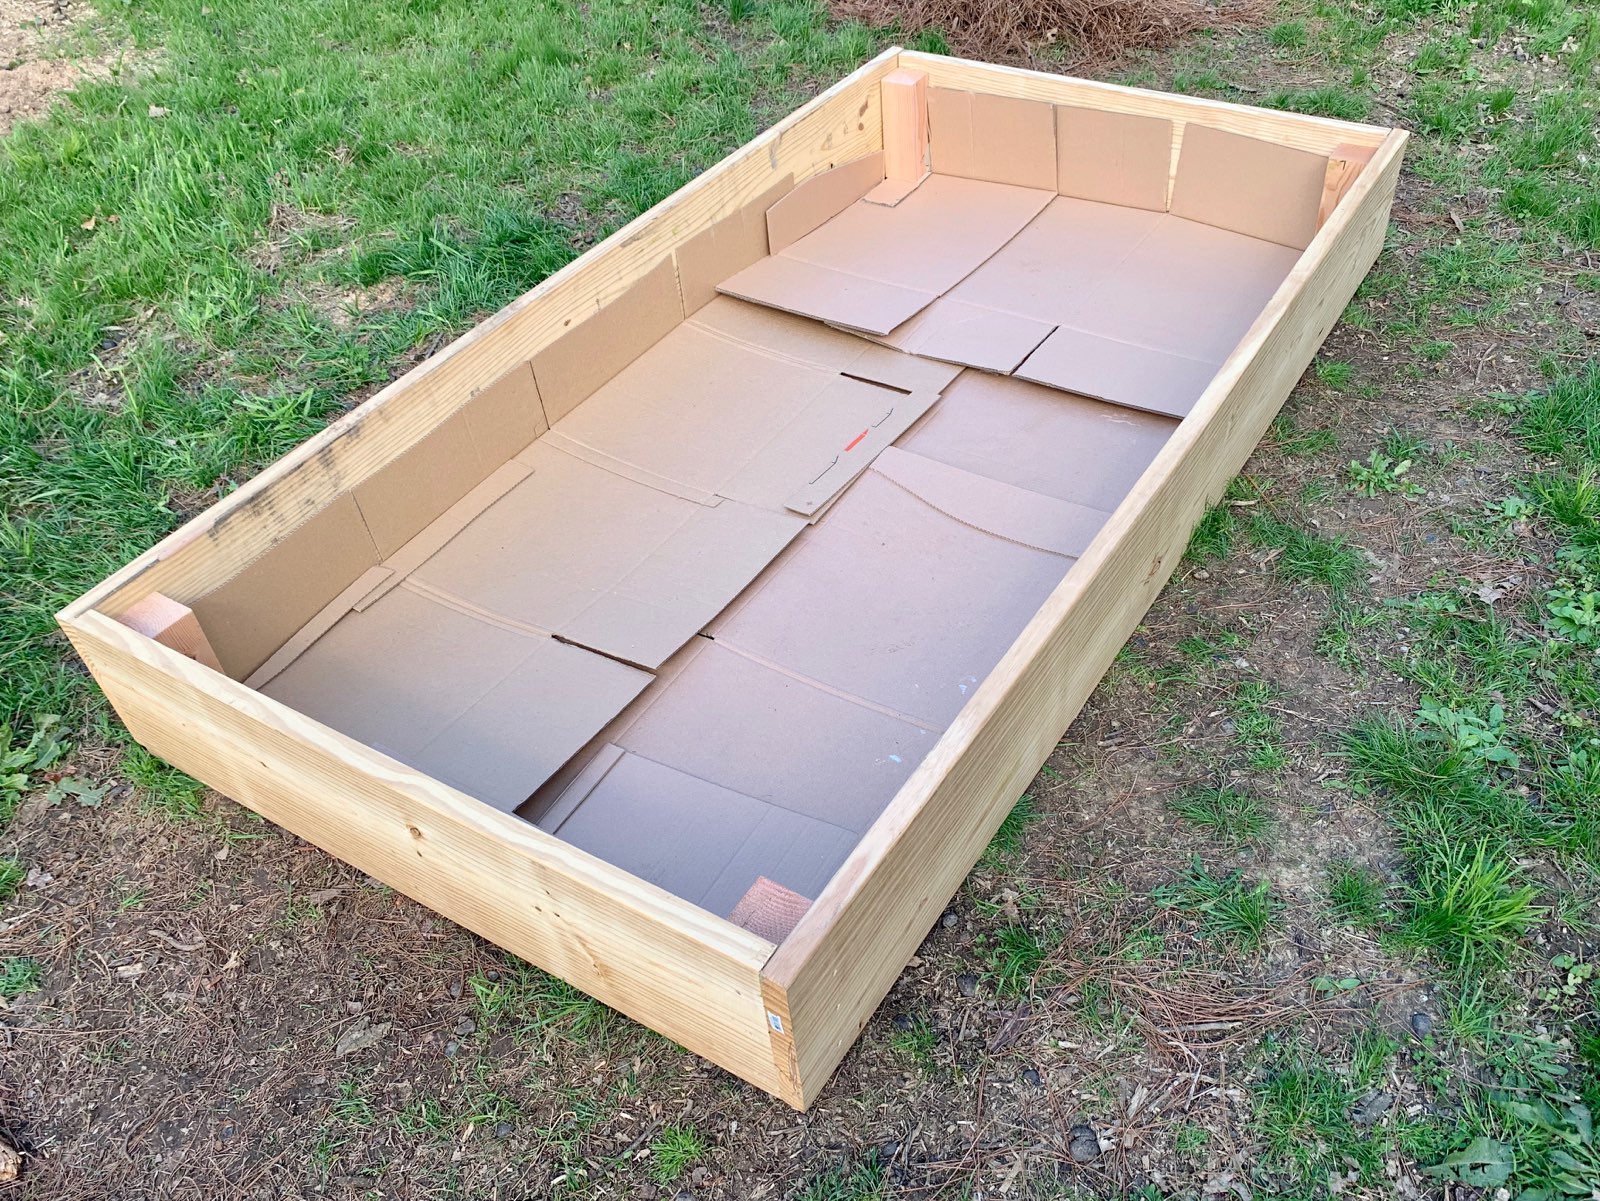
Add Cardboard / Photo Credit: Amber Grabowski
TIP: To calculate how much soil you need multiply the WIDTH x LENGTH x DEPTH to get the cubic feet of dirt needed.
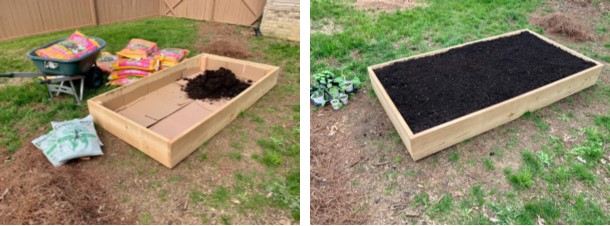
Add Dirt and Compost / Photo Credit: Amber Grabowski
This part is super easy! All you need to do is measure 12” on each side of the garden. Once that is complete you will tap a nail into the wood and tie an end of the twine to each nail at the 12” marks around the bed. You will notice I left a bigger space at one end because vegetables like cabbage, broccoli and cauliflower require more spacing for the quantity I wanted.
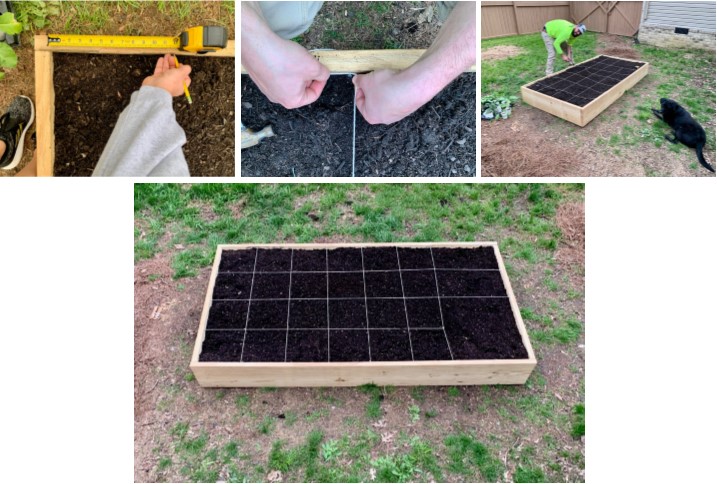
Square Foot Gardening Grid / Photo Credit: Amber Grabowski
This part was fun and overwhelming at the same time! After doing some research I settled on a square foot garden planting technique. I used a plant-a-gram I found from Williams Sonoma for beginner gardeners as inspiration and modified it to have certain things I knew I wanted in my garden. One thing to note, if modifying the plan there is a concept called companion planting…who knew! Certain vegetables and fruits grow better together and help protect and increase the yield and flavor.
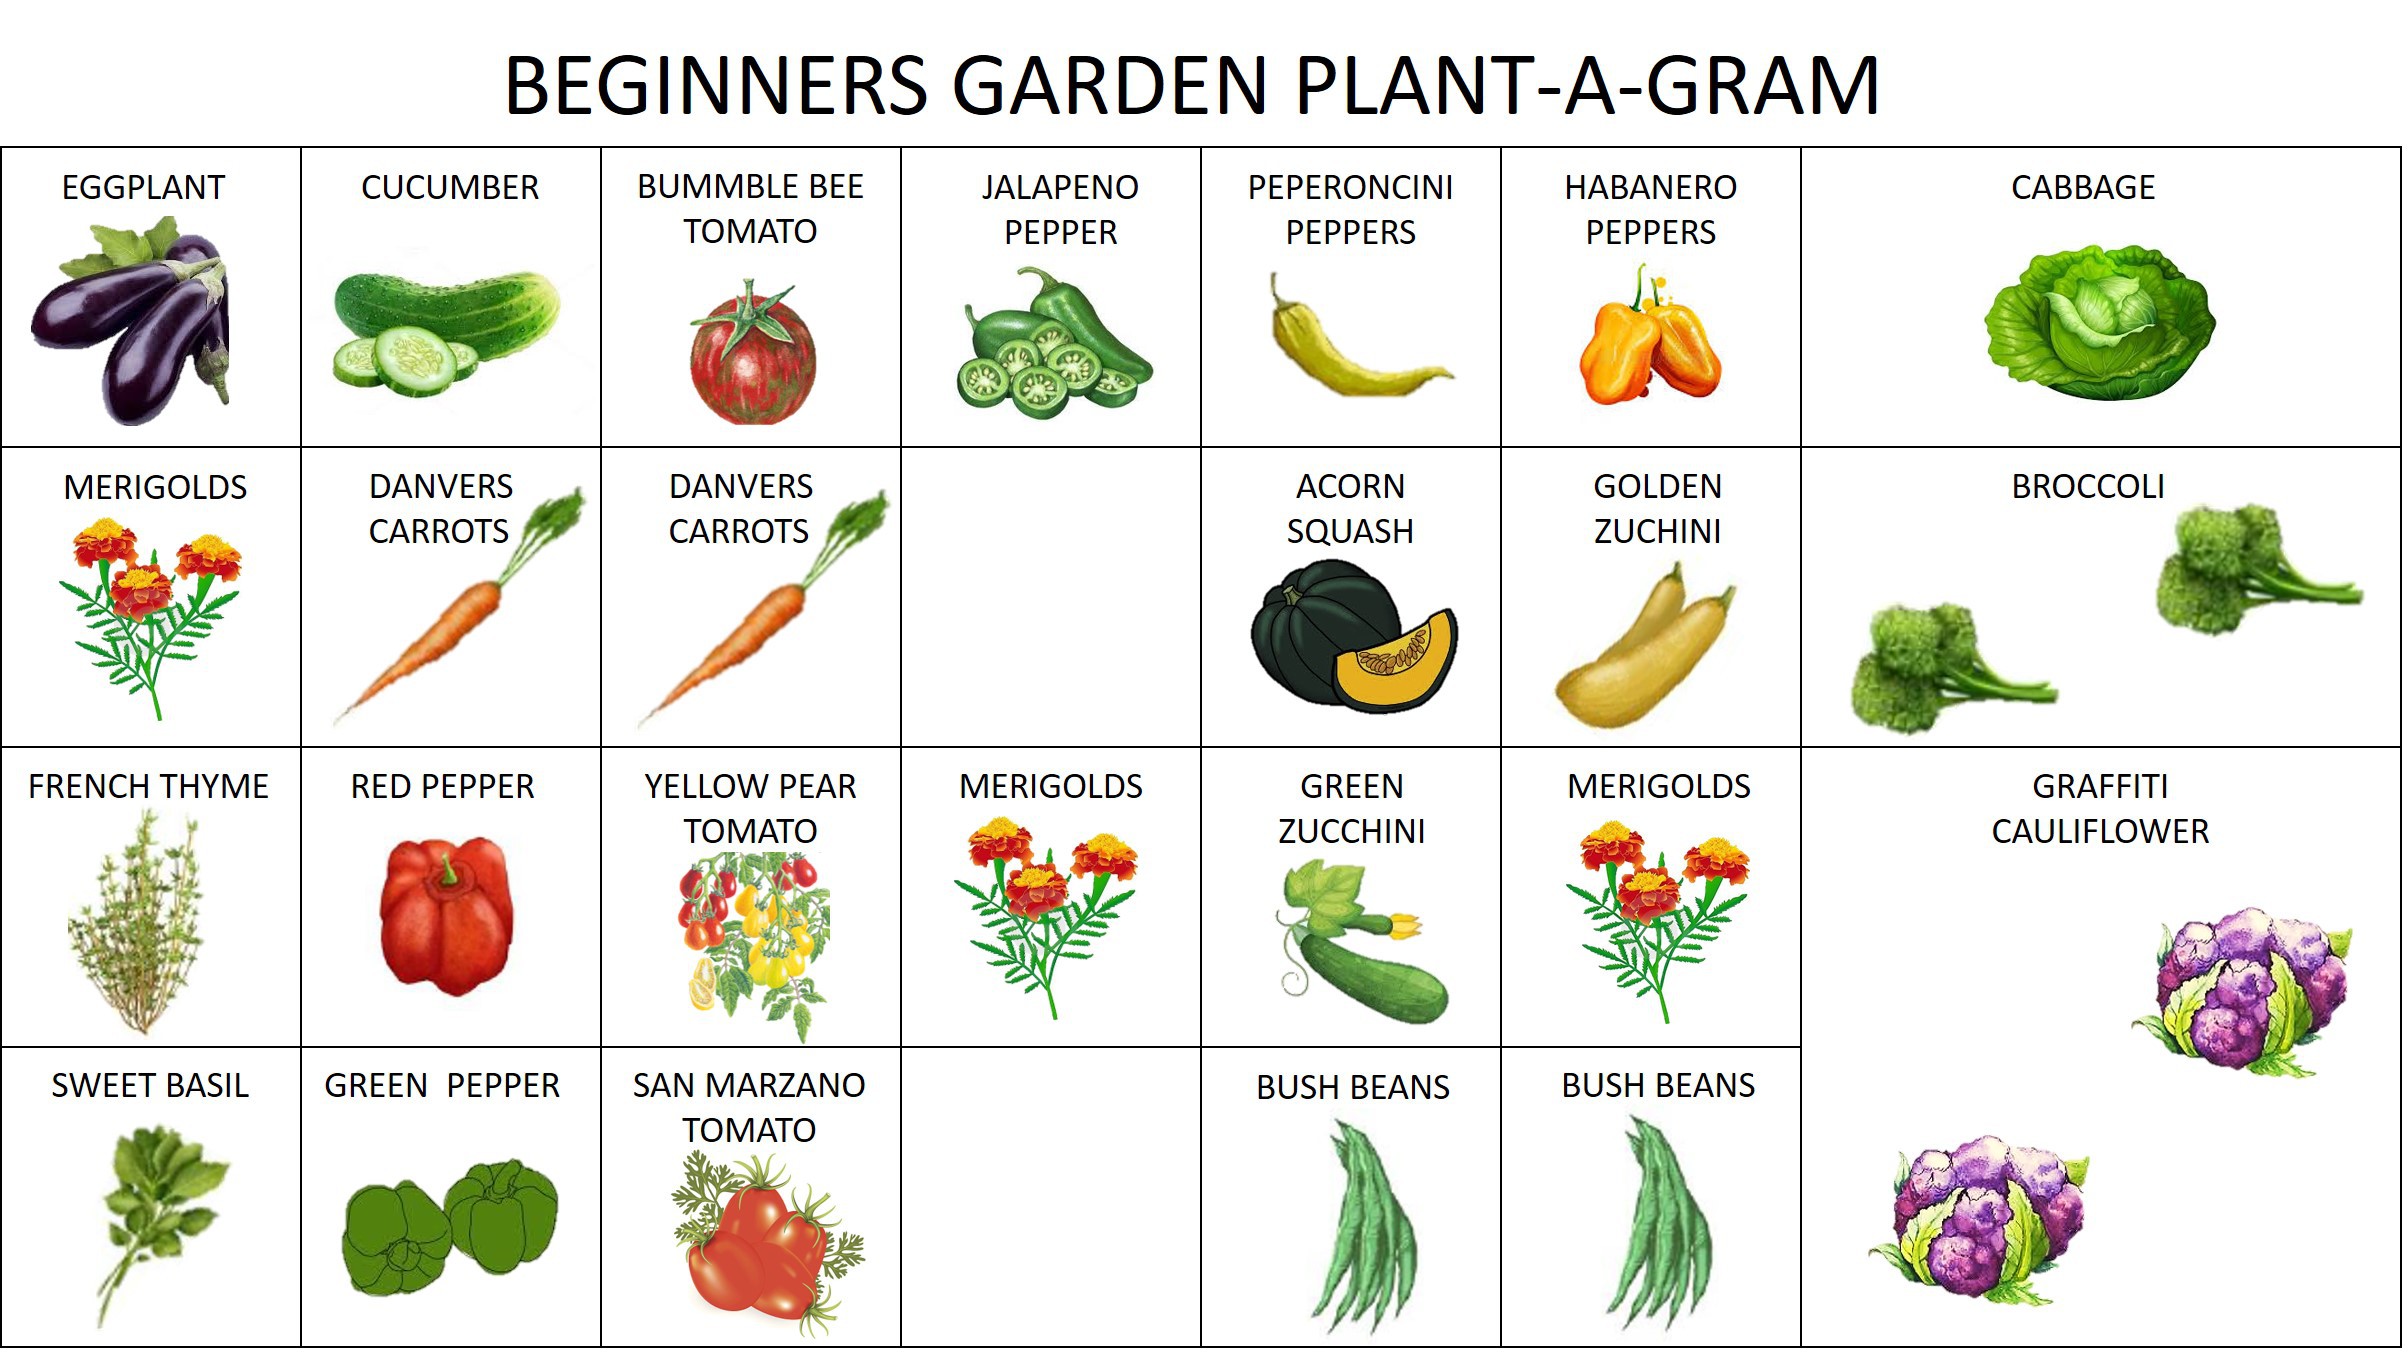
Taking the time to plan out what and where you are placing your vegetables and fruits will benefit you in the end. So, take the time!
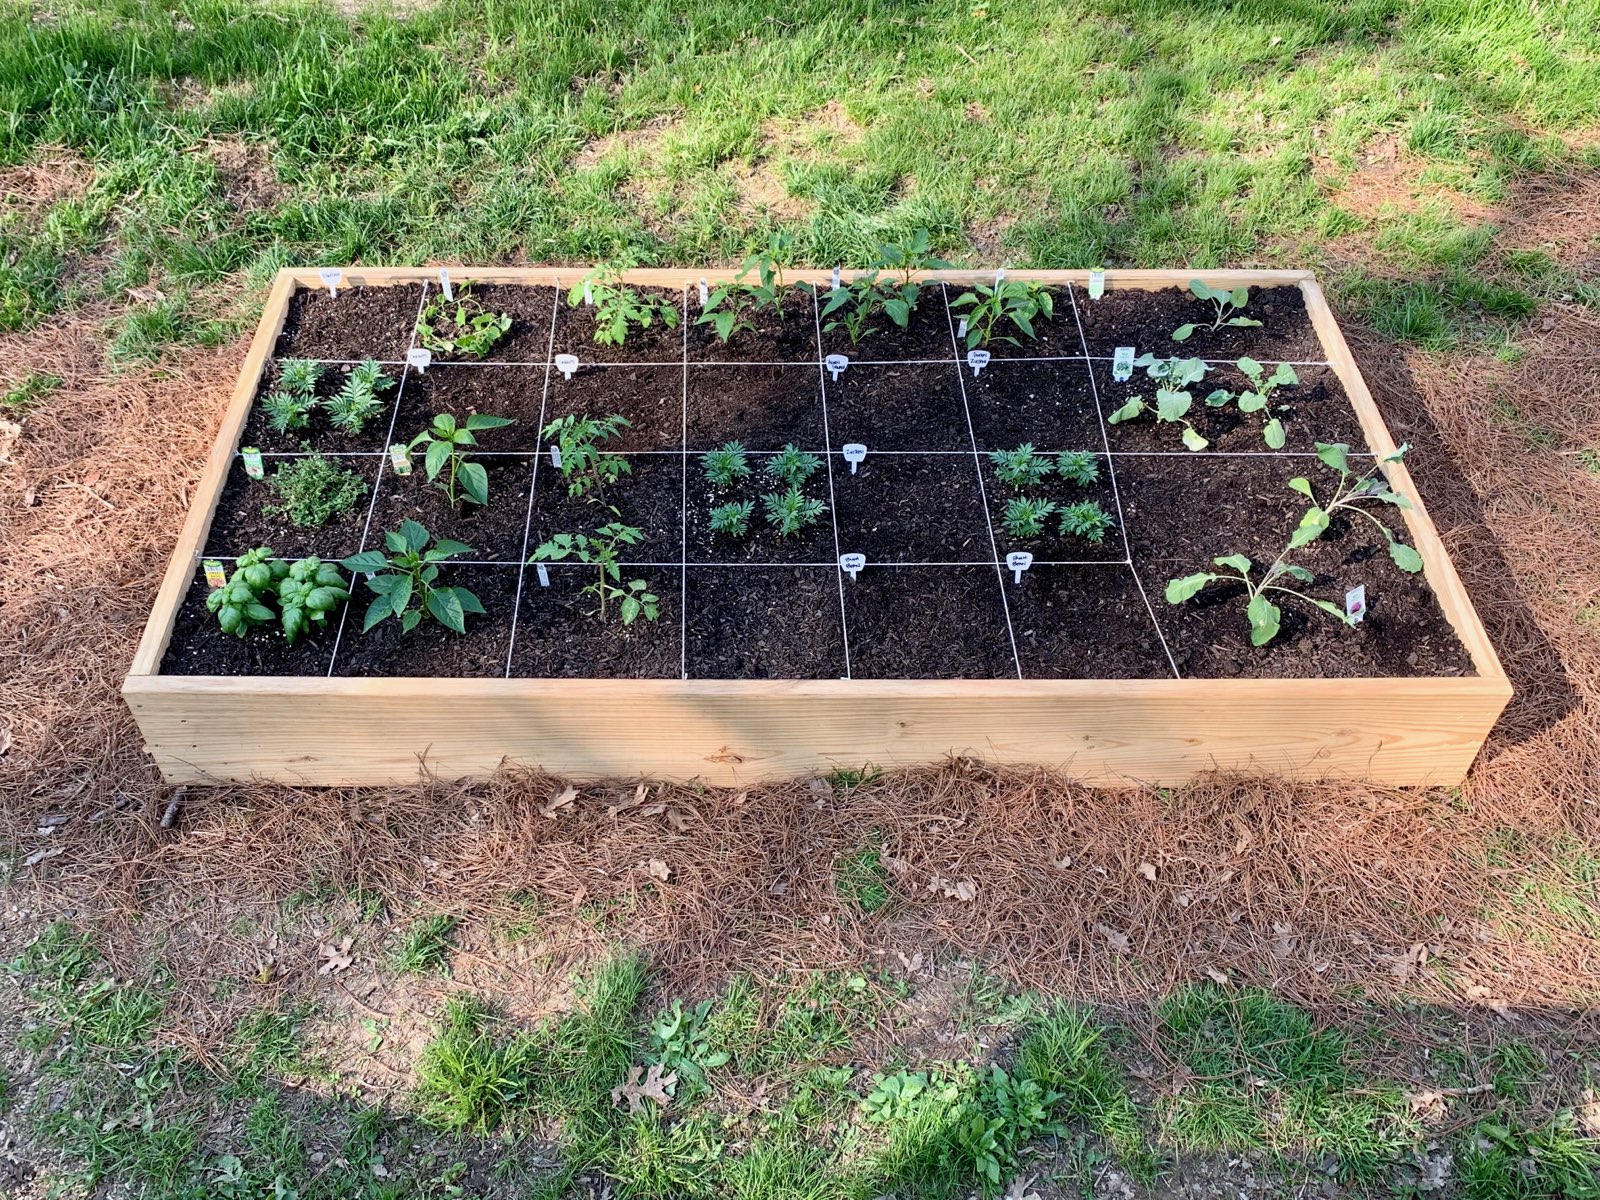
Raised Bed Garden / Photo Credit: Amber Grabowski
1st Step—Low Profile Planter
First, the easy one. For a low profile, above ground planter over dirt or yard, get 4 Oldcastle Planter Wall Blocks from Lowes or Home Depot and 2 pine or redwood 2x6x8ft boards. The length can vary but be sure to get two the same length. If you want the lumber store to cut the boards for you, think about how long you want your planter. If you want a square planter, have each board cut in half. If you want a rectangle make a cut at either 6ft or 5ft. The left over piece will be the short side. Find ground that is reasonably level and place the blocks on the ground and fit the boards in the slots to make a square or rectangle. For a little more stability you can pick up some ½ in rebar. Insert the rebar in the hole in the middle of each block and hammer it down flush. IMPORTANT: Be sure to hammer the rebar all the way down because it is dangerous to leave it sticking up in the air. You can stain or treat the boards if you wish but even untreated they should last a 2-4 years depending on your climate. Add some dirt and you are done! It should take about 8 cubic feet of dirt. Be sure to get above ground planter dirt or mix topsoil with your planting mix for a good blend.
2nd Step—Second Taller Planter
For a little bit harder version you can stack the Wall Blocks. This is what my mom did. This will be a little easier on the back and protect the garden from dogs and rabbits but it will take more dirt. This is a little trickier because the blocks need to be leveled and be level with each other. For reasonably level ground this is not too hard. Just find the high block and burry it until it is level with the rest, then level the block itself. Continue with the other blocks until all are level. Stack Wall Blocks as high as you want and use the rebar to stabilize each stack. Insert your boards. You may have to trim them to make them level at the top. If you don’t have a table saw you might want to make the ground as level as possible to eliminate this step. You can save on dirt by putting rocks or other non-compressible objects in the bottom of the planter box.
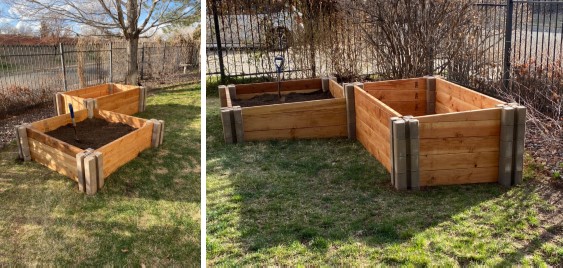
Additional Raised Bed Design / Photo Credit: Phil Fitzjarrell
- Start Small
- Plant What You Eat
- Know your Zone and Plant to Your Climate
- Pay Attention to Plant Spacing
- Amend Your Soil
- Be Prepared for Pests
- Plant Marigolds
- Water in the Morning Or At Night
Happy Spring and Happy Gardening!!
Way cool! Some extremely valid points! I appreciate you writing this post plus the rest of the website is also really good.Its amazing idea for gardening.
The facts have been discussed is really important. Thank you so much for sharing a great post.